
Matching Your Upgrade Ambitions to Your Actual Budget
Every home improvement project starts with a vision, but that vision needs to meet reality somewhere around the budget line. Too many homeowners fall in love with a design before they understand what it actually costs to execute, and the gap between dream and dollar amount leads to frustration, cut corners, or stalled projects. The good news is that with a clear plan, realistic pricing information, and the right contractors, you can scale almost any project to fit what you can actually afford. This guide walks through how to align your renovation ambitions with your real-world budget, room by room and system by system.
Setting a Realistic Renovation Budget Before You Start
Before you contact a single contractor, sit down and figure out what you can genuinely spend without straining your finances. This means looking at your savings, any financing options, and a firm ceiling you will not cross no matter how tempting an upgrade seems. Many homeowners make the mistake of budgeting only for materials and labor while forgetting permits, delivery fees, and the inevitable surprises that come with older homes.
Once you have a number, build in a cushion of at least fifteen to twenty percent for unexpected costs. This buffer protects you from having to halt a project halfway through because a hidden issue, like outdated wiring or rotted framing, suddenly ate up your contingency.
- List your total available funds, including savings and any approved loan amounts
- Separate must-have costs from nice-to-have upgrades
- Add a contingency fund of fifteen to twenty percent
- Get at least three quotes before committing to a budget figure
Choosing Between a Full Rebuild and a Partial Renovation

One of the biggest budget decisions homeowners face is whether to tear down and rebuild a section of their home or simply renovate what already exists. A full rebuild gives you a blank slate and often a more modern, efficient layout, but it comes with a much higher price tag and longer timeline. Working with experienced home builders early in this decision process can help you understand which option actually makes financial sense for your specific property and goals.
Partial renovations, on the other hand, let you preserve the bones of your house while updating the parts that matter most to your daily life. This approach is usually gentler on your wallet and can still dramatically improve both function and resale value. The key is being honest about whether patchwork fixes will actually solve your underlying problem or just delay a bigger expense down the road.
Budgeting for an Outdoor Deck or Patio Addition
Outdoor living spaces are one of the most popular upgrades homeowners pursue, and costs can vary wildly depending on size, materials, and design complexity. Hiring custom deck builders allows you to get a structure tailored to your yard’s layout and your family’s needs, but customization does add cost compared to a basic prefabricated kit. Getting a detailed quote that breaks down labor, materials, and permit fees will help you see exactly where your money is going.
Material choice has a huge impact on both upfront cost and long-term maintenance spending. Pressure-treated wood is typically the cheapest option, while composite materials cost more initially but save money over time by reducing staining, sealing, and replacement needs.
- Pressure-treated wood: lowest upfront cost, higher ongoing maintenance
- Natural hardwoods: attractive but pricier and harder to source
- Composite boards: higher initial investment, minimal upkeep
- Railing and lighting upgrades: can add ten to twenty percent to total cost
Comparing Decking Materials for Long-Term Value
When homeowners start comparing decking options, they often discover that composite metal decking has become a popular middle-ground choice for people who want durability without constant upkeep. This type of decking resists warping, rot, and insect damage far better than traditional wood, which matters a lot in climates with heavy rain or snow. While the per-square-foot price is higher than basic lumber, many homeowners find the reduced maintenance costs balance out the difference within a few years.
It is worth asking any contractor for a side-by-side cost comparison over a ten-year span rather than just the installation price. A material that costs more today but needs no refinishing or replacement for two decades may actually be the more budget-friendly choice in the long run.
Planning a Fence Project Around Material Costs

Fencing is another project where upfront choices dramatically shape your total spend. Many homeowners gravitate toward cedar fence materials because of their natural resistance to rot and insects, as well as the attractive reddish tone that ages gracefully. Cedar typically costs more than pine or spruce, but it often requires less frequent sealing and replacement, which can offset the higher sticker price over time.
Before committing to a fence style, measure your property line carefully and research any local regulations on height or placement. A surveying mistake or permit violation can add unexpected costs that quickly blow past your original budget, so it pays to confirm boundaries before materials are ordered.
- Confirm property lines with a survey or existing plat map
- Check homeowner association rules on fence height and style
- Get quotes for both material and labor separately
- Ask about warranty coverage for rot or insect damage
Finding the Right Roofing Contractor for Your Budget
Roofing projects tend to carry some of the biggest sticker shock in home improvement, which makes shopping around especially important. Get at least three to four quotes from local roofers before committing to anyone, since a single estimate gives you no real basis for comparison. Reaching out to several local roofers for estimates gives you a realistic sense of pricing in your specific region, since labor and material costs can vary significantly even between neighboring towns. Always ask for a written estimate that breaks down tear-off, materials, disposal, and labor separately so you can see where adjustments might be possible. A full tear-off and replacement on an average-sized home might run anywhere from $8,000 to $20,000 depending on your region and materials, while a simpler overlay could cost considerably less — though it’s not always the best long-term choice. Material selection alone can swing your budget dramatically: basic asphalt shingles are far cheaper than architectural shingles, metal roofing, or tile. Before signing anything, confirm that each contractor is licensed, insured, and offers a workmanship warranty, not just a manufacturer’s material warranty. Ask how they handle unexpected costs, like rotted decking discovered mid-project, since vague answers here often signal hidden fees later. Finally, check recent reviews and ask for references from jobs completed in the last year, since a roofer’s current crew and workload can matter as much as their reputation from five years ago.
It also helps to ask prospective contractors how they handle unexpected issues discovered during tear-off, like damaged decking, mold, or outdated ventilation that no longer meets code. These problems are common on older homes and can add anywhere from a few hundred to a few thousand dollars to your project, so knowing the protocol upfront matters. Reputable roofing companies will have a clear process for communicating these finds and getting your approval before any extra charges are added. Ask specifically whether they provide photos of the damage, a written change order with itemized costs, and a timeframe for you to approve or decline the work before it proceeds. It’s also worth asking how they price unforeseen repairs—per square foot of replaced decking, per hour of labor, or as a flat add-on fee—so you can compare estimates fairly across contractors. This level of transparency protects you from surprise invoices at the end of the job and gives you a realistic sense of how much cushion to build into your budget from the start.
- Request at least three written estimates for comparison, and make sure each quote covers the same scope of work so you’re not comparing apples to oranges
- Ask about workmanship warranties, not just material warranties — a solid contractor should guarantee their labor for at least 2-5 years
- Confirm whether disposal and cleanup are included in the price, including dumpster rental and magnetic sweeps for stray nails
- Verify licensing and insurance before signing a contract, and ask to see proof of both general liability and workers’ comp coverage
- Get a clear payment schedule in writing — reputable contractors rarely demand more than 10-30% upfront
- Check references or recent reviews to confirm the contractor consistently finishes jobs on time and on budget
Timing and Budgeting for Overhead Structural Fixes
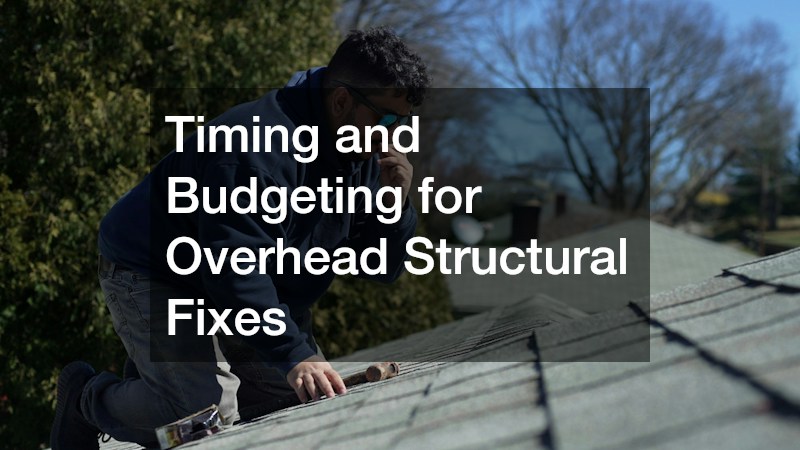
Not every roofing issue requires a full replacement, and understanding the difference can save you thousands of dollars. Minor roof repair work, such as replacing a handful of damaged shingles or resealing flashing around a chimney, is often far more affordable and can extend the life of your existing roof by several years. The key is catching problems early, since small leaks left unaddressed often lead to structural damage that turns a simple fix into a major expense.
Scheduling repairs seasonally also affects your final cost. Many contractors offer better pricing during their slower months, typically late fall or early spring, compared to the high demand of summer storm season.
Renting Equipment to Save on Labor Costs
Some portions of a renovation can be handled yourself if you have the right tools, and heavy equipment rental makes this possible even for homeowners without a garage full of machinery. Renting a mini excavator, skid steer, or trencher for a weekend can cost a fraction of what it would take to hire out that portion of a job, particularly for tasks like grading a yard, digging post holes for a new fence, or clearing out an old patio base. Daily rental rates typically run $150 to $400 depending on the machine, compared to the thousands a contractor might charge for equipment plus crew time on the same task. Before you commit, do the math on delivery fees, fuel costs, and any required safety training, since these can eat into your savings if you’re only tackling a small job. It’s also worth comparing rental durations; some companies offer discounted weekly rates that make sense if your project will stretch beyond a single weekend. Just be sure you understand the safety requirements and operating basics before committing to doing the work yourself. Many rental companies provide a brief walkthrough or operating manual, but it’s wise to watch instructional videos or ask for a hands-on demonstration beforehand. If the task involves utility lines, steep grades, or structural excavation, it may be safer and ultimately cheaper to hire a pro rather than risk costly mistakes or injury.
Debris removal is another area where smart planning saves real money. Ordering a dumpster rental for the duration of a renovation keeps job site cleanup simple and avoids the per-trip fees that add up quickly when hauling waste to a landfill yourself. A single trip with a pickup truck can easily cost $50 to $100 once you factor in landfill tipping fees and gas, and most renovations require several trips, so the savings compound fast. Many rental companies offer different container sizes, typically ranging from 10-yard bins for small bathroom remodels to 30- or 40-yard containers for whole-home projects. Matching the size to your project scope prevents paying for capacity you do not need, while undersizing means paying for a second pickup or overage fees for exceeding the weight limit. It also pays to ask about rental duration before booking. Most companies include a standard window of seven to fourteen days in the base price, and extending beyond that can add daily fees, so timing the delivery to match your actual demolition and cleanup schedule avoids paying for idle time sitting in the driveway.
Managing Home Systems Repairs Within Your Budget

Large cosmetic upgrades often get the spotlight, but functional systems like heating and plumbing deserve just as much budget attention. Scheduling heating repair before winter arrives is almost always cheaper than waiting for a complete breakdown during the coldest weeks of the year, when emergency service calls carry premium pricing. Routine maintenance, like replacing filters and having a technician inspect your system annually, also reduces the chance of costly failures.
When budgeting for a larger renovation, it is easy to overlook these background systems in favor of visible upgrades like new countertops or flooring. However, a failing furnace or water heater can derail your entire financial plan if it fails mid-project, so it is worth setting aside a small portion of your renovation budget specifically for system checkups before work begins.
Matching your renovation dreams to your real budget does not mean giving up on the vision entirely, it means making informed choices about where to splurge and where to save. Start by getting multiple quotes, prioritizing the projects that protect your home’s structure and function, and building in a buffer for the unexpected. With a clear plan and the right professionals at each step, you can create a home you love without compromising your financial stability.