Built to Last, Restored for Less A Practical Guide to Old-Home Repairs
There is an indisputable magic to stepping across the threshold of a classic home. From hand-carved millwork and heart-pine flooring to plaster crown moldings and thick masonry foundations, older structures possess an architectural soul that modern speculative builds struggle to replicate. However, for many homeowners, that enchanting honeymoon phase gives way to reality when the inevitable structural quirks and aging mechanical systems demand attention.
The widespread belief that restoring a vintage property requires unlimited financial resources often discourages prospective owners or leads to unnecessary, costly overhauls. The secret to sustainable historic home stewardship lies in strategic prioritization, understanding original craftsmanship, and distinguishing between urgent, critical fixes and cosmetic enhancements. By taking a systematic approach to maintenance, preserving original materials where possible, and forming targeted partnerships with specialized trade professionals, you can secure the physical integrity of your home while keeping your budget firmly intact.
1. Triaging the Envelope: Securing the Roof, Siding, and Exterior Shell
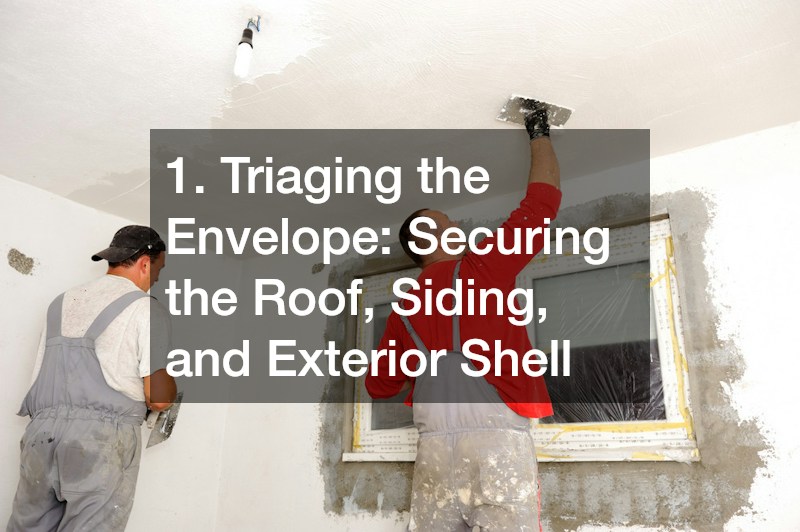
The exterior envelope serves as your house’s primary shield against environmental degradation. When moisture penetrates this outer layer, it initiates a destructive cycle that damages framing, undermines wall cavities, and degrades interior finishes. Maintaining this protective barrier is the single most critical investment an old-home owner can make.
Conducting a Comprehensive Exterior Inspection
Rather than waiting for ceiling stains or interior leaks to announce a problem, schedule a bi-annual perimeter audit every spring and autumn:
-
Examine critical junction points: Pay close attention to valleys, sidewall intersections, chimney flashings, and window caps where water is naturally funneled.
-
Inspect historic cladding: Look for signs of paint failure, cupping, or softness in wood siding, as well as cracking or spalling in brick or stucco.
-
Check structural alignment: Look up the roofline and down exterior walls to spot sagged ridge boards, bowed framing, or shifting corner boards early.
Spot Repairs Versus Full Cladding Replacement
One of the most expensive mistakes homeowners make is prematurely tearing down entire exterior walls. Historic siding—often crafted from dense, old-growth lumber—boasts natural rot resistance that far outlasts contemporary replacements. In most cases, targeted repairs yield far better long-term performance at a fraction of the cost.
Replacing a few damaged clapboards, scarfing in new wood patches, and re-caulking key trim joints can extend the life of an existing exterior by decades. When dealing with specialized roofing materials like slate, barrel tile, or historic metal roofing, consult local roofers who understand traditional fastening systems rather than replacing the roof entirely with asphalt shingles. Preserve original material whenever structural integrity remains intact.
When addressing areas where wood has degraded past the point of patch repairs, work with siding contractors experienced in historic architectural profiles. They can custom-mill or match hard-to-find lap widths and bevel angles, ensuring your patch work blends seamlessly into the surrounding structure without altering the home’s historic facade.
2. Foundations and Below-Grade Moisture Management
A home is only as stable as the ground beneath it and the foundation supporting its weight. While ancient fieldstone, brick, or poured concrete foundations possess incredible compressive strength, they are inherently susceptible to hydrostatic pressure and soil movement.
Differentiating Settling from Active Structural Failure
It is completely normal for a home that has stood for three-quarters of a century or more to feature sloped floors or minor hairline mortar cracking. Learning to evaluate these characteristics prevents unnecessary panic and costly repair bills:
-
Dormant Settling: Hairline diagonal cracks that terminate at door corners or window frames, accompanied by stable floors, generally indicate historical settling that reached equilibrium decades ago.
-
Active Movement: Stair-step cracking through masonry units, horizontal cracking along basement foundation walls, or new gaps between floorboards and baseboards suggest active movement requiring professional structural evaluation.
Diverting Water Away from Foundation Walls
The vast majority of foundation problems stem from poor surface drainage around the perimeter rather than underlying soil failure. Managing roof runoff before it saturates the earth adjacent to your basement walls is your best defense against structural movement and interior flooding.
-
Extend downspout assemblies: Ensure all gutter downspouts discharge water at least six to eight feet away from foundation walls.
-
Establish a positive exterior slope: The grade surrounding your house should drop a minimum of six inches over the first six feet extending outward from the perimeter.
-
Maintain perimeter swales: Keep low-lying landscape channels clear of debris so surface water bypasses the house during heavy downpours.
Consulting a local lawn care company can help resolve complex surface drainage issues. They can re-grade low spots along your foundation wall, re-establish swales, and build French drain systems to divert runoff away from your basement footings.
For persistent water intrusion, efflorescence, or structural wall bowing, bring in basement contractors who specialize in historic stone and brick masonry. Traditional lime mortar foundations require breathable repointing materials; applying modern Portland cement traps moisture inside soft historic bricks, causing them to spall, crack, and fail prematurely.
3. Mechanicals Masterclass: Heating, Cooling, and Ventilation Upgrades
Vintage homes were built around passive heating and cooling principles: deep porch overhangs, high ceilings, transom windows, and heavy masonry thermal mass. However, bringing modern thermal comfort to an aging structure without gutting walls or spending a fortune requires an understanding of legacy mechanical systems.
Optimizing Existing Radiator and Boiler Systems
If your home features original cast-iron radiators, resist the urge to replace them with modern forced-air systems. Radiators provide clean, quiet, and exceptionally comfortable hydronic warmth.
-
Bleed air annually: Trapped air prevents hot water or steam from circulating completely through the radiator fins, causing cold spots and forcing your boiler to overwork.
-
Refurbish control valves: Replacing worn radiator valves and installing thermostatic radiator valves allows room-by-room temperature control without changing piping.
-
Insulate supply lines: Wrap uninsulated steam or hot-water supply pipes running through unconditioned basements or crawlspaces to reduce system heat loss.
Low-Impact Air Conditioning Strategies
Adding central air conditioning to a home built without existing ductwork can be disastrously expensive if contractors cut through original joists, plaster walls, and historic ceilings. Instead, look for less invasive retrofitting options:
-
Ductless Mini-Split Heat Pumps: These systems utilize small refrigerant lines routed through interior wall cavities or exterior covers, delivering zoned cooling and supplemental heating without requiring invasive ductwork.
-
High-Velocity Small-Duct Systems: These feature small, flexible 2-inch supply tubing that can be threaded through existing floor framing, closet corners, and wall cavities with minimal plaster removal.
When evaluating system modernizations, partner with HVAC contractors experienced in retrofitting historic properties. Experienced specialists will perform manual J-load calculations tailored to thick-walled construction rather than over-sizing equipment, which inflates installation costs and causes short-cycling.
4. Electrical Upgrades and Panel Modernization

The true charm of an older home often lies in its original wall surfaces—thick, acoustically dampening lath and plaster. Gutting plaster to update electrical infrastructure is rarely necessary and destroys irreplaceable craftsmanship.
Navigating Legacy Electrical Systems Safely
Electrical standards have evolved dramatically over the last century. While early systems were ingenious for their time, they struggle under modern electrical loads:
-
Knob-and-Tube Wiring: Popular from the 1880s through the 1930s, this ungrounded two-wire system lacks grounded outlets and poses a fire hazard if covered with thermal insulation or spliced improperly into modern junction boxes.
-
Ungrounded Armored Cable (BX): Common in mid-century homes, early metal-clad wiring may feature degraded cloth insulation inside the armor, leading to intermittent short circuits.
-
Outdated Fuse Panels: 60-amp main fuse boxes cannot support modern kitchen appliances, HVAC equipment, and electronics safely.
Incremental Rewiring Techniques
Rather than stripping entire rooms, skilled local electrical contractors can fish modern non-metallic building wire through plaster walls using flexible drill bits, small access pockets behind baseboards, and floor joist bays. Installing Arc-Fault and Ground-Fault circuit breakers at the main panel adds modern safety protection to existing ungrounded circuits while you phase out legacy wiring room by room.
5. Plumbing Systems and Infrastructure Overhauls
Aging supply lines and waste pipes represent one of the most stealthy risks in historic properties. Galvanized steel pipes corrode from the inside out, restricting water pressure long before visible pinhole leaks appear on your basement ceiling.
Upgrading Supply Lines Efficiently
Replacing aging galvanized steel or lead piping doesn’t require demolishing kitchens and bathrooms. Flexible cross-linked polyethylene (PEX) supply tubing can be pulled through existing floor joists and wall cavities with minimal wall cuts, drastically reducing repair costs.
Managing Waste Stacks and Main Sewer Lines
Cast-iron drain stacks are built to last a century, but they eventually thin out along horizontal runs and develop vertical split cracks due to internal corrosion:
-
Prioritize main stack drops: Replace cracking main stacks with modern drain piping down to the basement slab transition.
-
Inspect underground runs: Engage trusted local plumbers who can perform video camera inspections of your underground main line before undertaking major indoor plumbing modernizations, identifying root intrusions or bellies outside the house early on.
-
Add cleanout access points: Ensure accessible cleanout plugs are installed along primary waste lines to make routine clearing straightforward.
6. Restoring Openings: Windows, Doors, and Thermal Efficiency
Original architectural windows are among the first features targeted for removal by modern replacement companies. However, replacing historic wood double-hung windows with vinyl inserts is often financially counterproductive and aesthetically damaging.
The Financial Myth of Vinyl Replacement Windows
Replacement window marketers often claim that new units will cut energy bills dramatically. However, the energy savings from replacing a wood window rarely offset the cost of purchase and installation within the window’s actual operational lifespan.
Vinyl replacement units typically carry a lifespan of 15 to 20 years before their insulated glass seals fail or vinyl tracks warp. In contrast, an original wood window crafted from old-growth lumber can last indefinitely when properly maintained:
-
Restore sash cords and weights: Re-hanging historic window sashes with bronze sash chain or heavy-duty cotton cord restores smooth operation without mechanical spring balancers.
-
Re-glaze window panes: Scraping out brittle glazing putty and applying fresh compound seals out air leaks and secures glass panes tightly.
-
Install spring-bronze weatherstripping: Tacking interlocking spring-bronze strips along sash stiles creates an airtight seal that performs comparably to new windows.
Enhancing Thermal Performance Cost-Effectively
To achieve modern thermal efficiency without discarding historic sashes, consider adding exterior or interior storm windows. A historic single-pane wood window paired with a tight-fitting low-E storm window creates an insulating air space that equals or exceeds the thermal performance of double-pane vinyl inserts.
Before agreeing to discard historic sashes, consult a specialized window company that focuses on custom historic restoration, sash repair, and storm window integration. They can rebuild rotted lower rails and re-weight balances while preserving your home’s original glass and trim profiles.
7. Interior Wall Preservation: Lath, Plaster, and Masonry

Plaster walls contribute significantly to an old home’s structural soundproofing, thermal mass, and visual character. Tearing down damaged plaster to install drywall is labor-intensive, creates immense dust, and removes a core architectural element.
Repairing Historic Plaster
In most cases, cracked or sagging plaster can be salvaged using non-invasive restoration techniques:
-
Re-anchoring loose plaster: Use plaster washers or injection adhesive kits to pull loose plaster coats back flush against the wood lath behind it.
-
Filling structural stress cracks: Scrape out fine cracks into a V-shape, apply mesh joint tape, and skim with setting-type joint compound for a smooth finish.
-
Managing interior masonry: For exposed interior brick chimneys or accent walls, brush away loose mortar and repoint with soft lime-based mortars matching the original mix.
8. Surface Renewal: Prep Work, Paint, and Curb Appeal Upgrades
Cosmetic upgrades deliver maximum visual impact per dollar spent. However, applying new paint or hardscaping over improperly prepared surfaces leads to rapid failure, turning an economical makeover into a costly headache.
Safe Lead-Paint Containment and Substrate Preparation
Any home constructed prior to 1978 likely contains layers of lead-based paint beneath modern topcoats. Safe prep work requires strict containment protocols to protect your household and ensure long-term paint adhesion:
-
Wet Scraping and Sanding: Never dry-sand historic paint coatings. Use HEPA-vacuum attached scrapers and spray misting to keep lead dust contained.
-
Addressing Moisture Issues First: Painting over wood with high moisture content causes paint to blister and peel within months. Test surfaces with a pin-type moisture meter before painting.
-
Applying Specialty Primers: Seal raw wood and scraped edges using oil-based or high-adhesion masonry primers formulated specifically for historic substrates.
Working with experienced local painters ensures high-reaching gables, complex exterior trim profiles, and delicate plaster walls are safely abated, repaired, and coated using period-appropriate color palettes and breathable paint formulations.
Budget-Conscious Curb Appeal Improvements
The approach to your home sets the tone for its overall care and historic character. Rather than ripping out existing hardscaping, focus on economical restoration:
-
Restore original walkways: Reset displaced brick pavers or bluestone flagging onto a refreshed sand and crushed stone base.
-
Refresh entryways: Stripping, sanding, and re-varnishing a solid wood front door restores warmth and beauty at a fraction of the cost of a modern replacement.
-
Paving and Driveway Maintenance: For homeowners with aging asphalt driveways, filling structural cracks, correcting edge unraveling, and applying a heavy-duty sealcoat protects the sub-base from water penetration and restores a clean, uniform look.
9. Strategic Contracting: Maximizing Trade Partnerships on a Budget
Managing costs on an older home isn’t just about doing the work yourself—it’s about knowing how to hire, direct, and collaborate with skilled craftspeople efficiently.
How to Hire Trade Specialists for Historic Homes
General contractors who deal primarily with new construction often default to tearing out old components and starting fresh. When interviewing contractors for a historic home, look for specific experience:
-
Ask for historic references: Inquire about previous projects involving pre-1950s homes and ask to see examples of plaster repair, window restoration, or stone repointing.
-
Define narrow, explicit scopes of work: Avoid vague bids like “update bathroom.” Instead, write precise work lists specifying which fixtures, trims, or finishes must be preserved.
-
Leverage hybrid DIY approaches: Offer to clear the workspace, handle non-structural demolition, or execute final paint prep yourself, allowing tradespeople to focus exclusively on technical installation work.
10. Long-Term Maintenance and Phased Restoration Strategy
The ultimate key to restoring an old home on a budget is pacing. Treating your project as a marathon rather than a sprint prevents financial burnout and allows you to live in the space to understand its unique flow before making irreversible changes.
Developing a Multi-Year Phasing Plan
Organize your restoration projects into clear, prioritized stages based on urgency and structural impact:
-
Year 1 – Water & Safety: Secure the roof, manage foundation drainage, clear high-risk electrical hazards, and ensure basic heating/plumbing stability.
-
Year 2 – Envelope & Thermal Comfort: Restore windows, repair exterior siding, insulate attic floors, and address HVAC efficiencies.
-
Year 3 – Interior Infrastructure: Update branch plumbing, pull localized wiring circuits, and repair historic plaster surfaces.
-
Year 4+ – Cosmetic & Architectural Refinement: Refinish original floorboards, restore decorative trim, repaint interiors, and refine exterior curb appeal.
By building a structured plan, honoring original materials, and executing repairs systematically, you ensure your historic home remains strong, functional, and beautiful without breaking your budget.
Restoring an older home is a journey of stewardship, patience, and practical decision-making. By protecting the exterior envelope, stabilizing foundation drainage, modernizing mechanical systems without destroying interior plaster, and preserving original features like wood windows and trim, you retain authentic character while controlling costs. An old house was built to last for generations—and with a clear plan, smart prioritization, and strategic trade partnerships, you can ensure it remains comfortable, safe, and beautiful for decades to come without overspending.